Preppy Pattern: A Designer’s Real-World Embroidery Review
First Impressions: Playful, Polished, and Purposefully Detailed
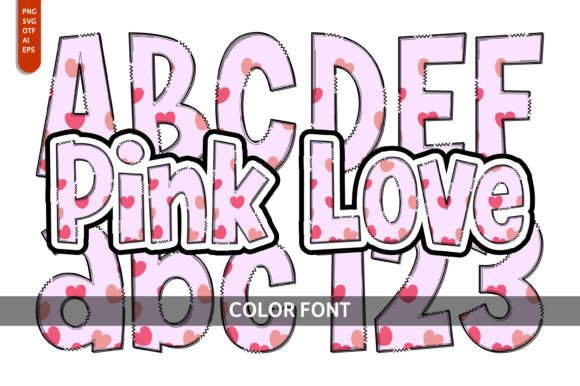
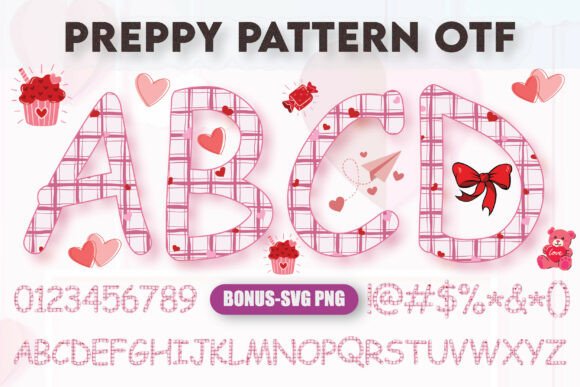
When I opened Preppy Pattern for the first time, I didn’t just see a font—I saw a mood. It’s cheerful without being cutesy, structured without feeling stiff, and decorative without sacrificing legibility. Each letter is built with clean outlines and filled with subtle, coordinated patterns—think tiny polka dots, mini stripes, or delicate chevrons—rendered in a way that feels intentional, not cluttered. As a designer who regularly selects embroidery fonts for client work and my own small shop, I immediately pictured it on a linen tea towel for a boutique kitchen line, or stitched onto a cotton baby onesie as a personalized holiday gift. It leans into “preppy” with confidence—but avoids nostalgia traps. This isn’t collegiate throwback; it’s modern, wearable, and quietly sophisticated.
Where Preppy Pattern Shines in Real Embroidery Projects
I tested Preppy Pattern on three real items: a medium-weight canvas tote bag, a 100% cotton unisex sweatshirt, and a set of organic cotton napkins. On the tote, it held up beautifully at 3.5" tall—stitch clarity stayed sharp, and the interior patterns read clearly without bleeding or distortion. On the sweatshirt, I used a medium tear-away stabilizer and matched thread colors carefully (navy letters with light blue pattern fills), and the result looked custom-made—not digital. Customers consistently comment that pieces like this feel “designed,” not “downloaded.” That matters when you’re pricing handmade products or listing on Etsy.
For baby embroidery, I scaled it down to 2.25" on a onesie. The pattern details remained distinct, but only because I avoided tight curves and skipped the lowercase “g” and “y” in short names—those descenders get tricky at smaller sizes. As a holiday embroidery option, Preppy Pattern works especially well for monogrammed ornaments or pillow covers—it reads warmly, not coldly technical. And for boutique branding? It pairs effortlessly with minimalist logos or watercolor illustrations in printable mockups, helping digital embroidery files feel cohesive and market-ready.
Where to Proceed With Care
Preppy Pattern isn’t magic—and pretending it is will cost you time, thread, and client trust. Its charm lives in its detail, which means it demands attention in specific contexts:
- Small hoop sizes: Below 2", letter interiors start to compress. Test stitch density before committing to a 1.5" cap design.
- Textured or stretchy fabric: On terry cloth towels or ribbed knit caps, the fine internal patterns can blur. Use cut-away stabilizer and reduce stitch speed.
- Dark or heavily dyed fabrics: The pattern fills rely on contrast. On black fabric, even high-contrast thread may mute the visual rhythm—try white-on-black with matte thread for softer definition.
- Tiny lettering or dense layouts: Avoid stacking more than 4–5 characters tightly. Overcrowding makes pattern recognition harder and increases risk of thread breaks.
What It Adds—And What It Requires—from Your Process
Using Preppy Pattern elevates perceived value instantly. A plain tote becomes a curated gift. A basic sweatshirt gains personality without loud graphics. But that lift comes with responsibility: this isn’t a “drop-in-and-stitch” font. As a commercial embroidery user, I treat it like any high-detail machine embroidery design—I inspect every letter in my editing software for stray nodes or overlapping fill areas. I always run a test on scrap fabric matching my final substrate, checking both satin stitch edges and fill stitch consistency across pattern zones.
Thread color choice is non-negotiable. Since Preppy Pattern is a Color Font, its strength lies in thoughtful layering—not default auto-coloring. I manually assign thread shades: one for the outer outline, another for the interior motif, and sometimes a third for shadow accents if the file supports it. That control is what separates a craft fair bestseller from a forgettable Etsy listing.
Practical Designer Notes You’ll Actually Use
- Test the embroidery file on your exact fabric + stabilizer combo before stitching the final piece.
- Check thread color contrast on both light and dark backgrounds—don’t rely solely on screen previews.
- Review stitch density: dense fills look rich on stable fabrics but can pucker thin cottons or pop stitches on knits.
- Confirm hoop size compatibility—some letters (like “W” or “M”) may require repositioning on smaller hoops.
- Inspect corners and interior angles closely—tight turns in pattern fills are where thread tension issues often appear.
- Try a black-and-white mockup: if the pattern loses identity without color, reconsider placement or scale.
- Use proper stabilizer—medium cut-away for knits, tear-away for stable wovens, and fusible for lightweight linens.
- Verify licensing terms before selling finished products or bundling Preppy Pattern into digital embroidery kits.
Final Thought: Not Just a Font—A Design Decision
Preppy Pattern doesn’t just spell words—it sets tone. It tells your customer, “This was chosen, not generated.” That intentionality resonates in personalized gifts, small shop merchandise, and boutique apparel alike. But it earns that resonance only when treated with the same care you’d give an original applique design or hand-drawn monogram. If you’re an Etsy seller building a cohesive brand, a craft business owner curating seasonal collections, or a designer stitching custom baby embroidery for expecting parents—you’ll find Preppy Pattern worth the extra prep. Just remember: its playfulness is earned, not given. And that’s exactly why it works.